


Picture-Frame-Clamp. Continued
Description
This section is from the book "Design and Construction in Wood", by William Noyes. Also available from Amazon: Design And Construction In Wood.
Picture-Frame-Clamp. Continued
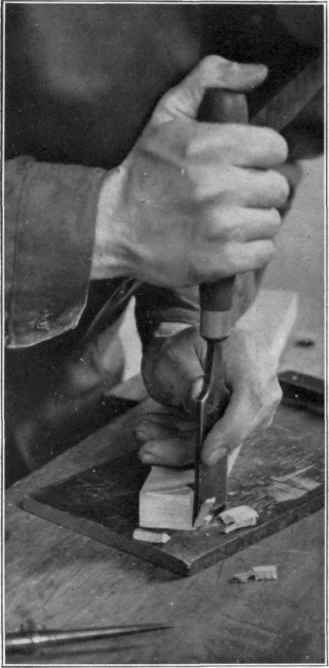
Fig. 56. Perpendicular chiseling.
Next gage a center line from end to end on both broad sides of each piece. Then set the dividers at 1 ½" between points and beginning at the square end, step off and prick in this center line 7 points, Fig. 58. Repeat this process
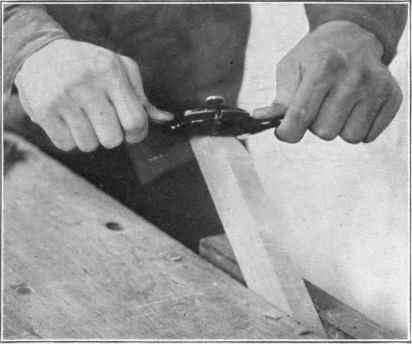
Fig. 57. Using the spokeshave.

Fig. 58. Stepping off distances with the dividers on the other side and do it on all four pieces. Then set the compass at ½" between points and starting from each point already pricked, prick 7 other points toward the rectangular end. Also make a mark on the center line 1¼" from the other (quadrantal) end.
Now bore the holes, first the 7/16" holes at the points first pricked, then the ¼" holes, at the points ½" from these. To insert the bit in the brace, hold by the left hand the sleeve of the chuck, pointing it upward, and revolve the handle with the other hand until the jaws open enough to receive the tang of the bit entire. Drop in the 7/16" bit, and reverse the motion until the bit is firmly gripped (Fig. 186, Handwork in Wood). Fasten one of the 16" pieces in the vise (Fig. 137, Handwork in Wood) flat side up, taking care to have it parallel with the top of the bench in order to help bore straight. Take the brace in the right hand and the bit in the left, and insert the point of the bit in the prick 1 ½" inch from the end. Now grasp the knob of the brace in the hollow of the left hand. Set the try-square upright near the work and sight from two directions, at right angles to each other, so as to see that the bit is perpendicular (Fig. 137, Handwork in Wood). Revolve the handle clockwise, bore about half way thru, then bore the next hole (1 ½" from the first) and so on, till all the holes in one side are bored. By counting the revolutions while boring, you can quickly learn when to stop. Turn the piece over and bore in the corresponding pricks on the other side. Bore the holes in all the pieces. Remember that unless the work is accurate, the clamp will be of no use as a clamp. Then insert the ¼" in the brace and bore the other set of holes in the same way. Bore a ¼" hole at the mark which is 1¼" from quadrantal end.
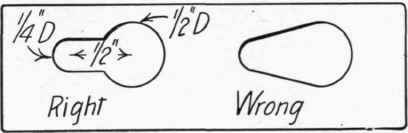
Fig. 59 Shape of holes in picture-frame-clamp.
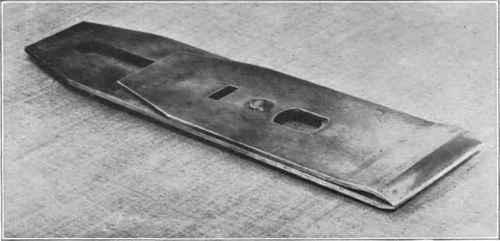
Fig. 60. Plane cutter and cap.
The next step is to cut out the space between each ½" and ¼" hole, making a buttonhole shaped opening, Fig. 59. Lay one piece down flat on the cutting board. Grasp the chisel as for perpendicular chiseling (see above), cut out an opening between the two holes, which shall be V-shaped in cross-section, but tangent to the outside of the small hole; that is, parallel to the sides of the piece. Gradually deepen this cut. Turn the piece over and repeat until you can cut clear thru it. Cut till the opening is tangent to the outside of the ¼" hole all the way thru, as in Fig. 59. There are 28 of these openings to cut.
II. Making the blocks. Next prepare the small pieces of hard wood. They are all ⅞" thick, 1½" wide, so plane them while they are all in one piece. In planing this hard wood, be content with taking quite fine shavings. Otherwise your plane is likely to be "choked." But if it does choke, do not try to pick the shavings out of the throat with another tool. This is likely to injure the cutter. Rather take the cutter out of the plane by first removing the clamp. If the shavings are wedged between the cutter and the cap, loosen the screw which holds them together using the edge of the clamp as a screwdriver, and remove the shavings and reset the cap, placing the edge of the cap quite close to the edge of the cutter (1/32"). See Fig. 60. Re-insert the cutter in the plane, adjust it carefully and proceed.
When the piece is properly planed up, saw it up into the right lengths; namely, 6 pieces, 3¾" long.
Set the sliding Tee-bevel at 45° (see p. 52) and mark out 2 internal angles on both ends of 4 of the pieces, as shown in the drawing. Set these diagonally in the vise; trim oft with the chisel a little of the arris across the thickness, and with the back-saw, saw out the angle as accurately as possible, Fig. 61.

Fig. 61. Me'thod of sawing stop blocks of Picture frame c amp.
If an accurate miter-box is available (like the Stanley or Lang-don) these notches may be accurately cut thus: Cut a 45° angle on a piece of wood 4" wide, and clamp this to the fence of the miter-box in such a position that the saw will just rest on the end arris of one of the 3¾" pieces as in Fig. 62. Saw to the center and repeat.
Smooth up the cuts with a sharp chisel, testing them to see that they are square with the broad side and make a true 90° angle with each other.
On each of these four blocks locate a point 1½" from one end and in the center sidewise, with a No. 5 gimlet-bit (number stamped on the tang), bore a hole partly thru, and screw in a round-headed screw (1½" No. 12) until the head is ⅞" from the surface, as shown in the drawing. You should be able to button this firmly into one of the openings which you have made in the long pieces.
Next prepare the hinge pieces (⅞"x l½"x3¾"). Bore a hole (with No. 5 gimlet-bit) ¾" from each end, part way thru. Slip a round-head screw (1½" No. 12) thru the hole at the quadrantal end of one of the long pieces and screw it into the hole just made in the hinge piece. The hinge piece should be screwed firmly down to the long piece but the joint should turn easily.
Insert screws in all 4 of these holes, making two hinged parts. Now oil all the parts with a coat of boiled linseed oil and wipe off with cotton waste.
Other projects involving the boring of holes are shown in Fig. 63.

Fig. 62. Cutting- notches in ends of blocks in the miter-box.
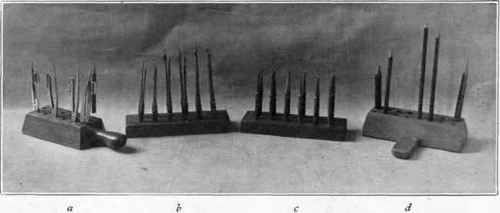
Fig. 63. Projects involving boring.
Continue to:


My Books

