


The Turning Tools. Part 3
Description
This section is from the book "Turning Lathes", by James Lukin. Also available from Amazon: Turning Lathes: A Guide to Turning, Screw Cutting, Metal Spinning and Ornamental Turning.
The Turning Tools. Part 3
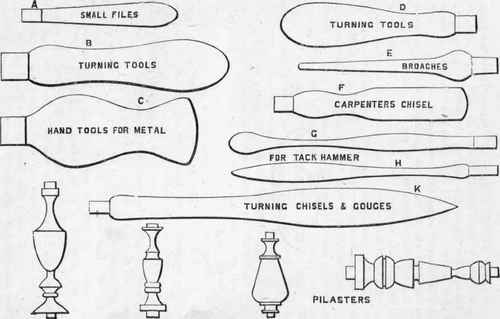
PLATE IV. - TOOL HANDLES AND PILASTERS.
It may readily be seen that it will be impossible to get a flat bottom with a sharply-defined angle in this way with the gouge; and, therefore, when such is necessary, the last touch must be given by a chisel, held quite flat on the rest. A common carpenter's chisel will answer very well for this. A dozen egg-cups will enable a learner to manage the gouge only, as they do not require to be finished inside to a flat surface; nor, indeed, is it necessary with a match-vase or spill-pot. But it will soon be discovered that a gouge cannot be used as described for deeper work, as the limit of its cutting power is soon reached. For deep work in soft wood, tools called hook tools are used in the trade, but are so difficult to manage as to be seldom found in amateurs' workshops. Round-end tools, chisels, and gouges are therefore used, and the surface finished with inside tools similar to those for hard wood, the finish being given by glass-paper. These tools will be fully described in treating of hard-wood turning. .
Boxes. - These will come next in order as needing a little more skill than egg-cup turning, as the cover has to be fitted nicely. The first thing is to cut off a bit of wood long enough for box and cover, with something extra to allow for the length of the taper screw and for waste - say, 4in. for a 3in. box or 2 ½ in. one. The wood can be held in a cup chuck instead of the taper screw, if preferred; and in that case it is merely trimmed roughly to a cylindrical form, and driven into the chuck about ½ in. To save the mandrel from violence, it may be thus driven in while the chuck stands on the bench, or on a block of wood, although it will most frequently be done after screwing the chuck on the mandrel. In this case, there is no need for heavy blows, which tend to damage the tail pin or mandrel; but a few steady taps from a light mallet will suffice if the wood fits fairly well. The learner will, however, find it necessary to drive the wood in more deeply than an adept, as he is more likely to have a hitch in of the tool, and in that way to throw the wood out of the chuck altogether. Supposing it to be secure, the first thing is to reduce it to a cylinder by gouge and chisel, and for this the back centre may be brought up to steady it. When, however, it is once shaped, the loose poppet is to be slid back, as before, out of the way. The usual way is to hollow out the extreme end for the cover, then to cut this off, and, from what remains in the chuck, to hollow out the box; and this is the best plan, as it enables the turner to try on the cover again and again, until a satisfactory fit results. Following this plan, the cover is to be faced off true with the chisel held quite flat on the rest; or, if it is very rough, the gouge is first used, laid on its back and held horizontally, the rest being, of course, turned round so as to bring the tee across the face of the work. Then, as soon as the surface is made flat, begin as for the egg-cup, only keep the hollow very shallow; and then, with the chisel held flat, square the recess thus made, and especially take care to make the side quite perpendicular to the bottom, and not in the least conical, for on this will the exact fit of the cover chiefly depend - and a well-fitted cover is a credit to the learner. Light cuts will have to be taken at last, using the more pointed corner of the turning chisel to get into the angle and to finish smoothly the inside. When the cover is done, a tool called a parting tool is generally used to cut it off. It is like a very narrow chisel, with (when meant for soft wood) a groove or notch in it. But this tool is not absolutely necessary. A tenon saw, held against the wood as it revolves, will soon cut it off; or the chisel set on edge and made gradually to cut a deeper and deeper notch till the piece is severed, or used to cut a deep notch, to be followed by the saw. After this, the end of the work is again faced off truly, and the rebate is cut, with the chisel, upon which the cover of a box always rests; but, in this case, it is left a little too large at the present stage, as it will be cut down again, and accurately finished after the box itself has been hollowed out. This is the work to be now taken in hand.
In either case the top of the box will be neither smooth nor level, but that will be rectified presently. The box itself must now be hollowed out as described, using the gouge as far as possible, but finishing with the chisel. Care must be taken not to go too deep, or in cutting it off when done there will not be found enough stuff left for the bottom, and it will come off in the form of a ring. After it is sufficiently hollowed out, and the inside is levelled and smoothed, the rebate or flange is finished till the cover will just go on tightly. This part must be left exactly cylindrical. It will be generally conical in the hands of a beginner, either small at top or at bottom of the rebate. The cover must slide on and fit all the way, and not go on easy at first and then fit tightly when pressed quite down. This accuracy will be found difficult, but patience must be exercised, and a very light cut taken each time after trying on the cover. The latter should fit so well that its junction with the box is only visible as a thin line. When the fit is perfect, the cover is left on, the rest put across the bed, and with the chisel laid flat upon it, the outside of the cover is turned to a dead level. With the sharp angle of the tool a few circles are often cut, by way of ornamentation, both on the top of the cover and also on the side of the box itself. The work now has to be cut off, just as the cover was severed. If a parting tool is used, it is placed exactly upright on its edge and steadily advanced, keeping it horizontal, or with the point only very slightly raised. This point must not be allowed to get, at any time, below the level of the centres, or the tool will be drawn in. Also, although its edge is so broad as to clear itself as it enters, it is safer to make it cut now a little on this side and now on that, so as slightly to widen its own groove as the cut is made. All danger of a catch in is thus avoided, and the tool can be advanced quite to the centre, when the box will fall off. With care and a little practice the bottom of the box should be quite level, but it will probably be found necessary to re-mount it on a wooden chuck, turned to fit inside it, so as to get at the bottom of the box for a final cut, to finish it. A very common fault to be guarded against is getting the bottom of the box rounded, so as not to stand well when placed on the table. It may be made very slightly hollow, which will not matter, but every care must be taken that the centre shall not project in the least. Of course, the outside of a box need not be of pill-box uniformity, but can be moulded to any shape, and, if so intended to be formed, the sides should be left rather thick when it is hollowed out.
Continue to:


My Books

