" Shadow " Work
Description
This section is from "Every Woman's Encyclopaedia". Also available from Amazon: Every Woman's Encyclopaedia.
" Shadow " Work
To do "shadow" work, make the long stitches on the wrong side and leave only a small stitch on the edge of the pattern on the right side, thus producing an outlined effect.
To work the trimming hold it wrong side up and work across the pattern from side to side, making long cross-stitches or herringbone stitches very close together. Work from left to right and begin on the lower line. * Take the needle upwards and to the right, and there make a tiny stitch, working through two holes of the net. Take the cotton to the lower line again and towards the right, and there make another tiny stitch by working through two holes of the net; and continue from * until the design is covered. Between the patterns work on the right side of embroidery small rounds with fine gold tinsel or else filo-floss, and backstitch round with the dark tussore coloured thread; also put four or five stitches on each end of the oval patterns to give a nice finish. Along the edge of the embroidery work a sprigged design, sewing over and over from two, three, and four holes of the net. This work is very quickly done, and is very effective when finished.
Blouse 1
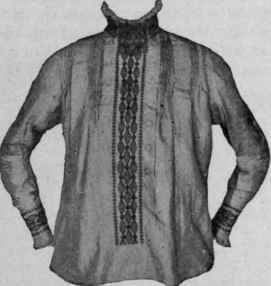
This is a useful coloured linen blouse worked with a scroll pattern. Use a transfer paper pattern, or draw the design and work with white linen, or flourishing thread, in satin or crewel stitch. (These stitches were described in "Embroidered Collars," page 87, Part 1.) Make the French knots by holding the working thread firmly and twisting it two or three times round the needle, then turn the needle upright and put it through to the wrong side of the material close to where it came out.
blouse 3
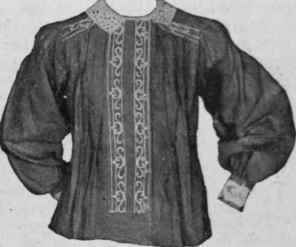
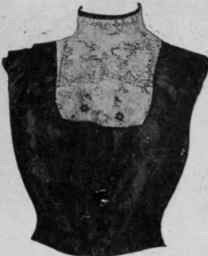
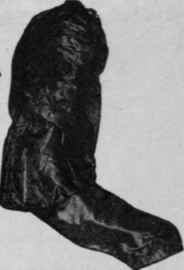
Shows a black silk blouse with an original design embroidered in black silk, with a small piece of light-coloured spangled net in front to give relief. The sleeve shows one of the latest patterns and the method of introducing a little fancy hand embroidery.
Blouse 2
Blouse 3
Blouse 3 (sleeve)
Buttons. - To decorate blouses with embroidered buttons, buy wooden blocks (sold for the purpose) and cover them with small rounds of silk like the blouse, and work them with crewel silk or filo-floss.
A Worked Wheel Makes a Pretty Decoration for a Button. - To do this make eight stitches in the form of an asterisk over the surface of the button (see illustration) and take each stitch down in the middle into the same hole.
To Work the Wheel. - Pass the needle through the centre and darn round and round, over and under all the stitches forming the wheel, until the whole of the button is covered.
Another way of decorating buttons is by means of a pattern done in loop or picot stitch and a circle of French knots. To do the loop or picot stitch, make a single stitch something like a chain-stitch and hold it down firmly with the thumb of the left hand, put the needle back to the wrong side of material, making a small straight stitch to keep the loop in place, and continue to make another loop at the side of the last one (see illustration).
Another Fancy Button. - Make a satin-stitch circle in centre, then row of French knots and a border of spaced buttonholing; or make French knots in the centre, and two rows of chain-stitch round the outside edge. If a silk waistband for a blouse is needed, make a buckle to give a pretty finish. Cut out an oval in cardboard and cover it with silk, and make French knots at intervals all round. Work the end of band with satin stitch and sew on the made buckle.
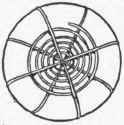
A worked wheel
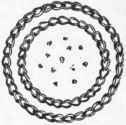
French knots in centre and two rows of chain Stitch
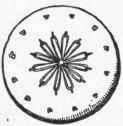
Loop or picot stitch and French knots
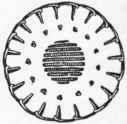
Satin-stitch centre
Continue to:
My Books

