


Taboret. Part 5
Description
This section is from the book "Design and Construction in Wood", by William Noyes. Also available from Amazon: Design And Construction In Wood.
Taboret. Part 5
The taboret is now ready for staining and finishing. If it is made of chestnut, a very handsome seal brown can be obtained by shutting it up in an air tight box with one-half pint of strong ammonia (28%) in an open dish. Let it stand for 24 hours or more, and then oil it with a mixture of one part boiled linseed oil and two parts of turpentine. Wipe off carefully. Inasmuch as the taboret is likely to be used as a stand for a flower-pot, it should not be shellacked or varnished, for shellac and varnish are apt to discolor under water, but it should simply be oiled and rubbed again and again, but principally rubbed. This can be done very easily with a buffing wheel on a lathe.
If made of cypress, the taboret should be stained so as to bring out the contrast between the yellow spring wood and the red summer wood of the annual rings. See Wood and Forest, pp. 11 ff. For this purpose oil stains are the most satisfactory. See Handwork in Wood, p. 209. An agreeable modification of the design described above is to set the lower stretchers edgewise, not flat, omit the upper ones, and fasten the upper ends of the legs directly to the top, into which they are notched, as in Fig. 145.

Fig. 144. One method of laying out an octagon.
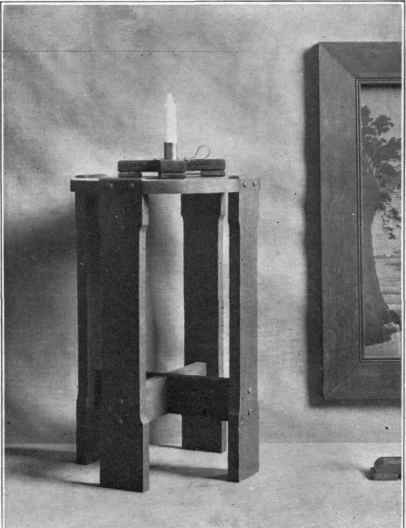
Fig. 145. Legs doweled directly into top.
In this case the lower stretchers are located in the legs by perpendicular center lines on the legs, as in Fig. 146. For fastening the legs to the top after it is glued up and dressed to size, if the legs are to be perpendicular, not slanting, lay out on the top the notches for the legs so that the distance from opposite ones shall be exactly equal to the length of the lower stretchers. Do all the laying out from the working edge {Handwork in Wood, page 72). See also Fig. 147. Lay out on both sides of the piece in order to insure accuracy in chiseling later.
If the top is to be circular, lav out the notches first. Then lay out and cut the circle and finally cut the notches. This order prevents the sides of the notches from splitting off in dressing up the circumference.
Lay out the circle 10½" in diameter. Then the top will project slightly beyond the outside of the legs, as in Fig. 147. The circle is to be cut out with a turning-saw. {Handwork in Wood, p. 67,) and dressed up with the spokeshave. To cut out the notches, use the back-saw, cutting just inside the lines, and chisel out the waste. In chiseling out the parts that run parallel to the grain, {A. and B, Fig. 147) cut only a little at a time for fear the wood may undersplit. In chiseling out the parts across the grain, (0 and D) lay the piece down flat on a piece of waste wood on the bench and fasten it firmly with a handscrew or between bench-stop and vise-dog. First place the edge of the chisel (a broad one) exactly on the line, hold it perpendicular and tap it lightly with the mallet. Then holding it obliquely, cut out a triangular groove, as in Fig. 148. With this groove once fixed, you can proceed more rapidly and with heavy strokes. When about half-way thru- the piece, reverse it and cut from the other side. Take care to keep the bench top free of chips or the wood will be marred, so that the legs will fit exactly. If arrises are to be chamfered or rounded, do it now.

Fig. 146. Locating position of end of stretcher on leg.
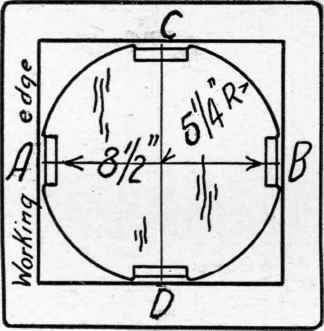
Fig. 147. Lay-out of taboret with legs doweled into circular top.
In assembling, proceed as before, page 104, nailing first, and then substituting dowels for nails. A more elaborate six legged taboret is shown in Fig. 149. In this case there is no half-lap joint, but the legs are doweled into two boards, top and under, both of which are notched to receive them. The process of assembling is as described above, nailing with glue, extracting the nails, and substituting glued dowels. The one shown in the figure was made of cypress, stained brown, and oiled and rubbed repeatedly.
If the legs of the taboret are to be not perpendicular but slanting, as in Fig. 150, the proper "batter" or angle at the ends of the stretchers may be obtained by means of the steel square, a straight edge, and the bevel. See Fig. 151. Suppose the distance from the top of the upper stretcher to the bottom of the lower stretcher to be 13" and the bottom of the lower side of each arm of the lower stretcher to be 1" longer than the top of the upper surface of the arm of the corresponding upper stretcher. Lay the steel square on a board with a straight edge, placing the 13" mark on the blade and the 1" mark on the tongue exactly on the straight edge. With a pencil scribe on the board the angle which the tongue makes with the straight edge. This is the angle needed for the ends of the stretchers, and also the angle for the tops and bottoms of the legs. (See Handwork in Wood, 3rd edition, p. 201, note.) Transfer this angle by means of the sliding T-bevel. See Handwork in Wood, p. 113.

Fig. 148. Starting to cut out the notches.

Fig. 149. Taboret with six legs.
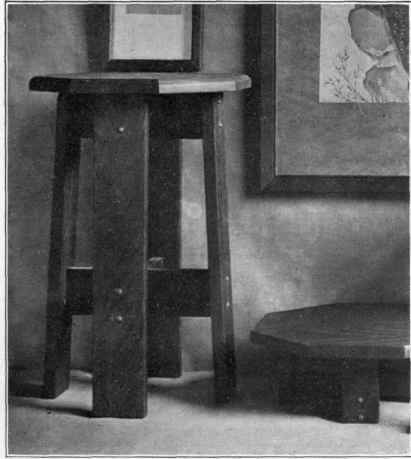
Fig. 150. Taboret with slanting legs.
Fig. 152 shows a foot stool made of mahogany with a woven reed seat, stained to match the mahogany. The top is a frame made with end-lap joints, each member 3½" wide so as to give plenty of surface for gluing.
-8

Fig. 151. Obtaining the batter lor slanting legs.
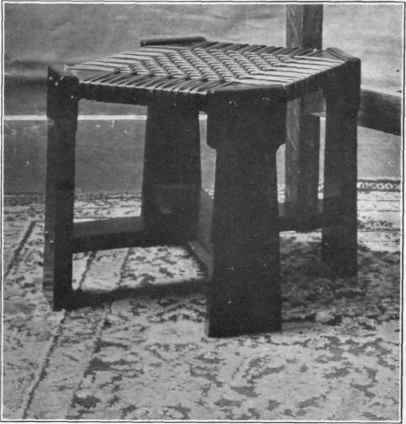
Fig 152 Mahogany stool with woven reed seat.
Continue to:


My Books

