


The Candlestick. Part 3
Description
This section is from the book "Design and Construction in Wood", by William Noyes. Also available from Amazon: Design And Construction In Wood.
The Candlestick. Part 3

Fig. 104. Drillholes in pedestal for brads.
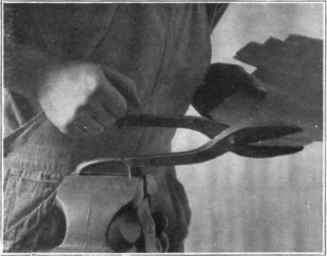
Fig. 105. Cutting copper with snips.

Fig. 106. Ends of strip for socket beveled so as to butt well.
Take for the capital a piece of wood several inches long. The extra length makes it easier to plane, and lessens the danger of splitting when the hole is bored.
Plane it with square edges to the proper width and thickness and bore a ⅞' hole into it, gripping it sidewise in the vise. This also is to prevent splitting it. If the piece is ⅞" thick the hole should be about ⅝' deep, bored with a Foerstner bit. Next saw off to the proper length and finish the ends of the piece neatly with the block-plane. It may be glued and screwed securely to the column, driving the screws thru what wood is left at the bottom of the hole.
IV. The Feet. Four pieces ⅜"x2"x2". Plane up one strip of wood to the desired thickness; in this case⅜' thick, 2" wide and 8½" long, and if the arrises are chamfered or otherwise shaped, this should also be done before cutting up into small pieces. After cutting up, finish what are to be the outside ends of each piece harmoniously with their sides. That is, have the shape continuous around each foot. To fasten on the feet, drive from the underside of each foot two or three small brads, ¾", No. 18, until the points just prick thru.

Fig. 107. Stake for hammering-copper socket.

Fig. 108. Hammering a strip into a cylinder.
Put a little glue in the middle of the upper surface of each foot, adjust and press it to its proper place, and drive the brads home. The piece is now ready to be cleaned up and finished. After carefully sandpapering, wet the surface with water in order to "raise the grain," and when dry sandpaper once more. Then when the water stain is applied, the grain will not rise again.
If the piece is made of mahogany, it may be darkened with a solution of bichromate of potash crystals, to be obtained at any druggist's. Make a saturate solution. It dissolves readily in hot water. If this is applied full strength, the color of the wood will be a dark brownish red. A good proportion is one part of the saturate solution to three parts of water. Apply with a brush and wipe off the surface at once with cotton waste. If, after a little exposure to the light, this does not appear dark enough, another coat may be added.
Rub down the surface with steel wool. A simple and effective method of finishing this piece is to oil it with a mixture of boiled linseed oil, one part, and turpentine, two parts. This should be wiped dry and rubbed hard many times with a little of the oil on a rag.
If more gloss is desired, give the piece a coat of wax. (See Handwork in Wood, page 214.)
V. The Metalwork. For the socket and pan for the candlestick, sheet copper, gage No. 20, is needed. To get the proper size for the socket or cylinder, wrap a piece of paper around the candle to get its circumference, and add to this four times the thickness of the copper. With the snips, Fig. 105, cut a piece of copper this length, and as wide as the depth of the socket, say 1". Hammer the piece flat with the mallet on the bench. File the long edges straight and parallel and square, and the end edges square to the side edges, but with a slight bevel toward what is to be the inside of the socket, so that when the piece is curved into cylindrical shape, the ends will butt well, as in Fig. 106.
Continue to:


My Books

