


The Mitered Picture-Frame. Part 5
Description
This section is from the book "Design and Construction in Wood", by William Noyes. Also available from Amazon: Design And Construction In Wood.
The Mitered Picture-Frame. Part 5
13½"; the frame is an inch wide and the rabbet ⅜" wide. Hence the

Fig. 77. Device for holding strips when rabbeting.

Fig. 78. End view of rabbeted strip.

Fig. 79. Rabbeted and inhered member of picture-frame.
Now set up the picture-frame clamp (Fig. 53), adjusting the small parts to their proper holes, put the members in place, face up, and clamp the whole together in a handscrew. If any corners do not make a close joint, either the angles are not square or the opposite members are of unequal lengths. Make them right before you proceed.
When everything is ready, take the frame apart, put a little glue (see Handwork in Wood, p. 128) on all surfaces that are to join, and reclamp. Test the corners with a try-square, and if they are not right angles, adjust the handscrew by sliding one jaw sideways, one way or the other, until the angles come up right. Be sure that the faces are flush. Leave the frame in the vise for 6 hours to dry. When the frame is taken out of the vise it should be handled carefully, for the joints still need to be reinforced. A common way to do this is with brads. If brads are used it is a safe precaution to make a hole before gluing with a bradawl thru one piece. Fasten the frame in the bench vise, so as to grip only one member at a time, and that vertically. Bore the hole and drive in the brad with great care.

Fig. 80. Position of molding in miter-box.
A better reinforcement is by means of a spline or slip-feather (see Handwork in Wood, Fig. 268, No. 55). A convenient way to insert these is as follows:
Get, if possible, some maple veneer 1/28" thick and cut it with a knife into 8 pieces about ¾" x 2". Fasten the frame in the vise diagonally, so that one corner will project, and with the back saw cut two saw-kerfs, A and B, as in Fig. 82 and Fig. 83. The pieces of veneer should fit snugly into these kerfs. If the veneer is too thick, scrape or sandpaper it until it slips into the kerfs. If the veneer is too thin, use two pieces with glue between them for each kerf, thinning them if necessary. Put glue on both sides of each piece of veneer, slip it into place and set the frame away to dry. When dry, cut off the superfluous veneer with a chisel or knife. With the plane, set very fine, smooth up any surfaces that need it, and sandpaper the whole. Sand off the sharpness of all arrises. Be very careful to leave no glue showing.
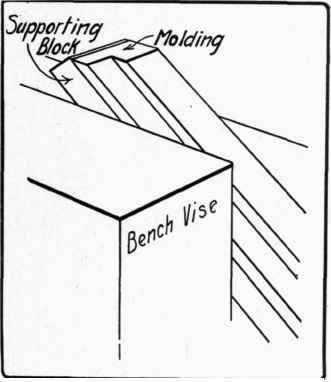
Fig. 81. Holding member of picture frame in vise to trim the miter.

Fig-. 82. Sawing a kerf in which to insert a spline.
The next step is to stain the frame. As this frame is to be black, a simple method of staining it is to dissolve a little nigrosine in alcohol; and apply with a brush. Directions for a more penetrating black stain are to be found in Handwork in Wood, p. 211.
A good finish for picture-frames, which are handled but little, is wax. Apply as before directed. (See Handwork in Wood, p. 214).
Next cut the picture backing, so that the grain will run the short way of the picture. It can be cut conveniently with a sharp knife and a straight edge. If neces-sarv, cut on both sides and then break. Cut enough, and in as large pieces as possible, so as to cover the entire surface of the picture and mat as they lie in the frame. Next cut the glass to fit the frame, in this case 9½"x 13½". A glass cutter with hardened steel revolving disc can be bought for 10 cents. It is well to practice on a piece of waste glass. To cut the glass, proceed as follows: Make marks on the glass near the edges at the proper length. Lay a straightedge of wood one-eighth of an inch to the left of these marks (to allow for the distance of the cutting disc from the face of the glass cutter). Hold the glass cutter perpendicular, and with one firm stroke scratch the glass from edge to edge, Fig. 84. Be sure that the extreme edges are scratched. Then holding up the glass in the left hand, tap the underside of the glass near the near edge with the glass cutter, until the edge just cracks, Fig. 85. Now take hold of the portion of the glass to the right of the scratch between the thumb and first finger of the right hand, and with a slight pressure the glass will break clean along the line of the scratch, Fig. 86. If the scratch is so near the right edge that there is not room to hold it so, as described above, with a pair of pliers, carefully snap off the waste a little at a time, Fig. 87. Mark and cut the width in the same way.
Continue to:


My Books

