


Lesson III Stepped Cylinder
Description
This section is from the "Elementary Turning" book, by Frank Henry Selden. Also available from Amazon: Elementary Turning.
Lesson III Stepped Cylinder
Use the piece worked to a cylinder in Lesson 2. Set the rest close to the piece, and with the rule and

Fig. 18. Stepped Cylinder.
pencil, as shown in Fig. 19, make a mark, while the lathe is in motion, one inch from the left-hand end. With the acute point of the skew chisel cut a small groove at the place marked by the pencil. Hold the skew chisel as shown in Fig. 39.
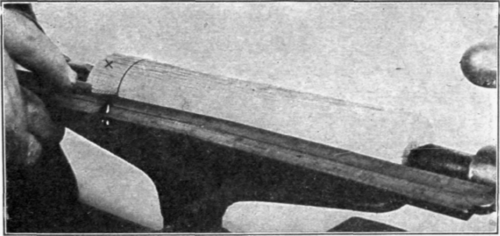
Fig. 19. Marking Spaces with a Pencil.
These inch spaces may be marked by using the chisel, as shown in Fig. 31, instead of the pencil.
The pencil is better and easier at first. After you have become more familiar with the lathe and tools, you can use other methods for marking spaces.
After you have made a mark and cut a groove with the skew chisel, remove about 1/16 inch in thickness of material from the right-hand end of the piece up to the mark. Do not attempt to turn off this waste with the skew chisel, but use the roughing gouge, holding it as shown in Fig. 13, until it is near the groove; then roll the gouge so that the corner will cut close to the shoulder, as shown in Fig. 20.
After the roughing gouge has been used, hold the skew chisel as shown in Fig. 15, 16, or 17, and smooth the smaller part of the cylinder in the same manner as described in Lesson 2 for making a cylinder.
In order to true the surface close up to the shoulder, the handle of the skew chisel should be lowered until the obtuse corner of the cutting edge completes the cut (Fig. 21). The tendency is to

Fig. 20. Rolling the Roughing Gouge.
roll the handle instead of lowering it. This should not be done for it is quite certain to cause the corner to cut too deeply. Should you wish to smooth the surface to the right hand, do not forget to change the skew chisel to the position shown in Fig. 15. While smoothing towards the left hand of each part, hold the chisel as shown in Fig. 16. Continue marking off inch spaces and cutting steps, until the piece has the shape shown in Fig. 18.
It is not so essential that each step be exactly 1/16 inch, as that the surface between the steps be exactly straight and smooth. Should you be obliged to make the large ends less than 1 3/4 inches in diameter, the steps may be only 1/32 inch. Be careful to cut no deeper with the point of the skew chisel than the amount of the step, for any mark at this place left in the finished piece shows badly.
Before presenting the piece for inspection, write your name and the date on the surface, near the large end. Do not forget to mark the end so that it can be replaced in the same position on the live-center.

Fig. 21. Smoothing Up to a Shoulder.
Continue to:


My Books

