


Cutting. Part 2
Description
This section is from the book "Wood-Block Printing", by F. Morley Fletcher. Also available from Amazon: Wood-Block Printing.
Cutting. Part 2
A good position for cutting a long straight line towards oneself on the block is shown below (fig. 8). The left hand is on its side, and the middle finger is hooked round and pulls the knife while the right hand guides it.
In all cases the middle finger of the left hand pushes or steadies the knife, or acts as a fulcrum.

Fig. 7. - Position of the hands in using the knife.
A beginner with the knife usually applies too much pressure or is apt to put the left finger at a point too high up on the blade, where it loses its control. The finger should be as close down to the wood as possible, where its control is most effective. A small piece of india-rubber tubing round the knife blade helps to protect the finger.

Fig. 8. - Another position of the hands in using the knife.
With practice the knife soon becomes an easy and a very precise tool, capable of great expressiveness in drawing. Bear in mind that both sides of a line are drawn by the knife. The special power of developing the expressive form of line on both sides is a resource tending to great development of drawing in designs for wood-block prints. The line may be of varying form, changing from silhouette to pure line as may best serve to express the design. It should never be a mere diagram.
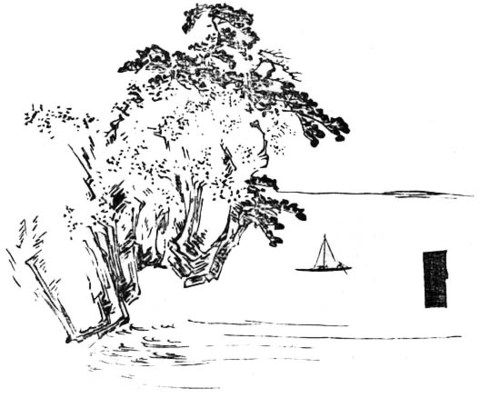
Plate VI. Reproduction of an impression (reduced) of the key-block of a Japanese print showing admirable variety in the means used to suggest form.
 Fig. 9. - Knife cuts in section.
 Fig. 10. - Diagram of knife cuts.
The actual cutting proceeds as follows: Starting at some point where the surface of the key-block design has been oiled and made distinct, a shallow cut is made along one side of any form in the design, with the knife held slanting so that the cut slants away from the edge of the form. A second outer parallel cut is then made with the knife held slanting in the opposite direction from the first, so that the two cuts together make a V-shaped trench all along the line of the form. The little strip of wood cut out should detach itself as the second cut is made, and should not need any picking out or further cutting if the first two cuts are cleanly made. This shallow V-shaped trench is continued all round the masses and along both sides of all the lines of the design. No clearing of the intervening spaces should be attempted until this is done. It will be seen at once that the V-shaped cuts give great strength to the printing lines, so that a quite fine line between two cuts may have a strong, broad base (fig. 9). The depth of the cut would be slightly shallower than that shown in this diagram. In cutting fine line work a cut is first made a little beyond the line, then the cut is made on the line itself (fig. 10).
Where a very fine line is to be cut, especially if it is on a curve, the outer cut of the V trench should be made first, and then that which touches the line: there is thus less disturbance of the wood, and less danger of injuring the edge of the line.
When the V cut has been made outside all the lines, one proceeds to clear the intervening spaces between the lines of the design by taking tool No. 1 (fig. 5). The large spaces should be cleared first. The safest and quickest way is to make a small gouge cut with No. 1 round all the large spaces close up to the first cut, then, with one of the shallower chisels, Nos. 5, 6, or 7 (fig. 5), and the mallet, clear out the wood between the gouge cuts.
Continue to:


My Books

