


Exercise XXI. Gouging
Description
This section is from the book "Manual Instruction: Woodwork. The English Sloyd", by S. Barter. Also available from Amazon: Manual Instruction: Woodwork.
Exercise XXI. Gouging
Fig. 257. The drawing should be the plans of sides at right angles to each other, or a section, as shown in fig. 258.
A piece of wood 12 ins. long is to be grooved on all its sides, as shown.
Mark the wood across 1 1/2 in. from the ends, and mark lines down the length of the wood between these lines with pencil and thumb-gauge. Then draw the shape of the rounded ends outside the end lines.
The method of using the gouge is simple. Lay the rounded side on the wood, and press forward with the right hand grasping the handle and the left hand keeping the edge firmly down, as in fig. 259.
Do not gouge too deep at first, but go over the work again and again, finishing at last with a good clean cut. Be careful to work in the direction of the grain to avoid possible splintering.
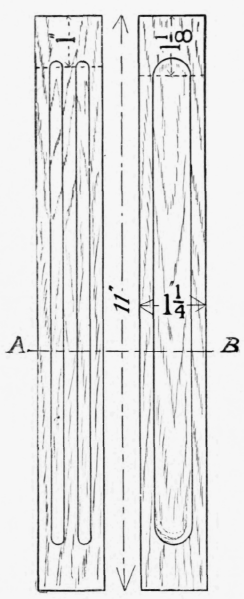
Fig. 257.

Fig. 258.
The ends of the grooves should be modelled with the same gouge used for the corresponding groove.
Place a piece of glass-paper round a strip of wood ready planed up to the shape of the groove, and steadily rub up and down, taking care not to damage the sharp edges of the grooves. Saw off the waste at the ends and plane them true. The edges should also be cleaned off with the smoothing plane.

Fig. 259.
Continue to:


My Books

