


Model XI. A Towel Rolle
Description
This section is from the book "Manual Instruction: Woodwork. The English Sloyd", by S. Barter. Also available from Amazon: Manual Instruction: Woodwork.
Model XI. A Towel Rolle
Fig. 193
Stopped dovetail halving, boring, and modelling with plane are here involved.
The drawings showing part of the front elevation, the section of the roller, the section through the middle of the roller socket, and the section through the rails showing the inside of the bracket should all be drawn, as well as the plan of the dovetail halving joint.
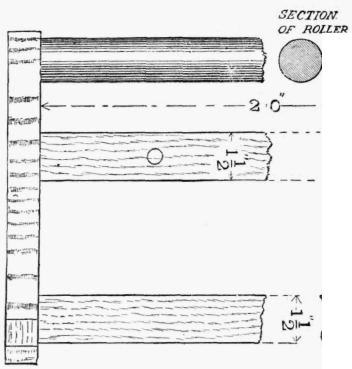
Front elevation.
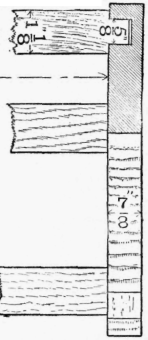
Front elevation, with section through bracket on a b.
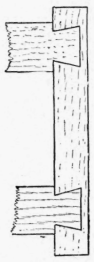
Elevation of back of bracket showing joints.

Inside elevation of bracket with section of rails.
Fig. 193.
Yellow deal will serve very well as material for this model.
A piece of wood 5 1/4 ins. wide, 1 in. thick, and 13 1/2 ins. long will be enough from which to make the two end brackets, if, after planing the wood up true on both faces and edges, they are marked on the surface, as shown in fig. 194. As in previous similar cases, waste of wood is prevented by doing this, and the lesson of planning development before commencing work so as to economise wood, and yet have the grain in the right direction, when the part is fitted into its place, should be thoroughly learnt at once.
The roller can be of any required length, but 2 ft. is the length chosen here. A roller of the same thickness as that shown should be made from wood 1 1/4 in. square. The two supporting strips should be each 2 ft. 2 ins. long, by 1 3/4 in. wide, and 3/4 in. thick.
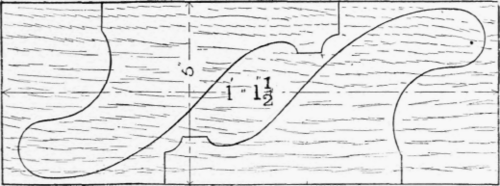
Fig. 194.
Referring again to fig. 193, mark out the socket for the pin at the end of the roller, and on the edges of the wood make pencil lines at the correct position for the dovetails. Cut out the brackets with the bow saw, and screwing them together, face to face, in the vice, finish up the curve with the spokeshave and file. Bore the socket for the roller and lay the brackets aside.
Mark the shoulders of the dovetails and the roller pins, by placing the three pieces of wood side by side, and squaring cut lines across them all, at the proper distance apart. Draw the two concentric circles, showing the curve of the roller and the pin, on each end of the square strip, as in fig. 195.
Now cut a little way in, for the shoulders of the pins, before commencing to model the wood into its finished form. When the roller is rounded with plane and file, pare down vertically to remove the waste wood round the end pins, and complete these with a file also. Any waste outside the proper length of the pins should now be sawn off, and the roller is complete.
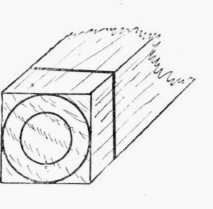
Fig. 195.

Fig. 196.
The dovetails of the supporting strips should be sawn out, and the socket marked on the back of the brackets, in the manner described in the preceding exercise. Fig. 196 shows one joint made, and one dovetail applied in its proper position for marking the corresponding socket.
In putting the parts of the model together, dovetailed joints should be glued, and the roller may either be glued or made to revolve by inserting a screw from the outside, through the bracket into the ends of the pins.
Continue to:


My Books

