


Model XXX. - A Book Rack Made With The Lapped Dovetail Joint
Description
This section is from the book "Manual Instruction: Woodwork. The English Sloyd", by S. Barter. Also available from Amazon: Manual Instruction: Woodwork.
Model XXX. - A Book Rack Made With The Lapped Dovetail Joint
Fig. 291
The orthographic projections in fig. 291 should be drawn. The timber required will be, of course, dependent upon the precise size of the book rack required; but a larger size than that in the drawings is not recommended, as it would be too difficult.
To make a rack similar to that shown of, say, walnut, a piece 16 ins. long, 4 1/2 ins. wide, and 3/4 in. thick will be required for the base, and another piece 10 ins. long, 4 1/2 ins. wide, and 1 in. thick, will be wanted for the two ends.

Elevation.
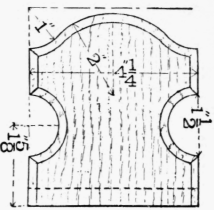
Side elevation.
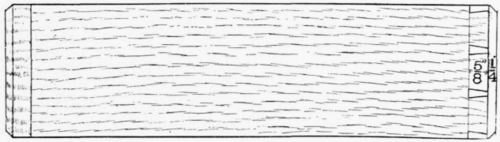
Plan.
The dovetail joint is shown at one end, a, and the plan of the lapping portion of the end is shown in fainter lines. The plan of the complete arm is shown at the other end.
Fig. 291.
Plane up the wood as usual, and make the base true on the ends and 15 1/4 ins. long. Cut the short piece in halves, and plane one end of each piece true. Set the marking gauge to 5/8 in., and gauge across the end of each standard, to give the depth of the mortices between the pins on the standards, and without altering the gauge, mark lines at both ends of the base, on both faces of the wood, to mark the depth of the mortices to take the pins of the standards. Another line, 1/2 in. in from the edge, should be cut or gauged across the face of the standards, to indicate the depth from the edge of the mortices between the pins. These latter can now be drawn on the end, as in the case of the common dovetailed joint. Cut out the mortices with saw and chisel. Apply the pins of the standards to the end of the base, and mark out the shape of the end of the pins, as in fig. 283. Saw out the mortices in the base, cutting just inside the lines, and remove the waste with a chisel.
If the joints are found to be correct on fitting them together, take the model apart again, and putting the two standards together in the vice, and with saw, spokeshave, and file make the curves in the sides and on the top.
The chamfering should now be done, and the convex curve on the side and the curve at the top may be finished with the spokeshave and file, the straight chamfering on the sides may be shot with a plane. Clean off the inside of the base and standards, and glue up the joints. Finally, when dry, clean off the outside with trying and smoothing planes.
Continue to:


My Books

