


The Workroom And Its Fittings. Continued
Description
This section is from the book "Manual Instruction: Woodwork. The English Sloyd", by S. Barter. Also available from Amazon: Manual Instruction: Woodwork.
The Workroom And Its Fittings. Continued
Tool Rack
This is lettered B in fig. 293, and a larger sketch is shown in fig. 296. The pigeon-holes at the top are for storing work, and the shelf underneath is for storing the tools. Fig. 297 is a working drawing of one half of the tool shelf. It contains separately in brown paper, as they are very apt to rust if exposed.

Fig. 296 the equipment for five boys, except the hand and tenon saws.
The back of the tool rack should be match-boarded, as shown. Fig. 298 shows the rack with the tools in position.
Tool Cupboard
This is to contain the saws and the tools which are general to the class, such as files, punches, braces, and bits. This cupboard is divided into two parts, the bottom being devoted to the general kit of tools, while the top is for the saws, drawing material, etc, and should be provided with one or two drawers to hold punches, bits, and files. The latter should be wrapped b, Hammers.
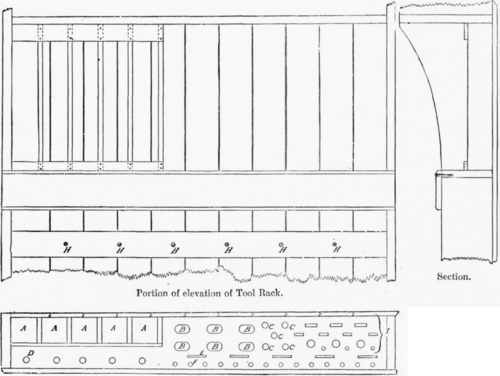
Plan of Tool Shelf.
Fig. 297.
A, Jack planes.
C, Screw-drivers.
D, Marking gauges.
E, Try-squares.
F, Bradawls and gimlets.
H, Mallet pins. I, Varioussizesofchisels and gouges.
Working drawings of portion of Tool Back, showing holes and spaces provided for the various tools.
Timber Racks
Two are required. That lettered d in fig. 292 is for storing the boards horizontally.
The boards are laid on wooden or iron bars fixed in the wall, and a few strips of wood should be put between each board, to give a free circulation of air. There should be several rows of bars.
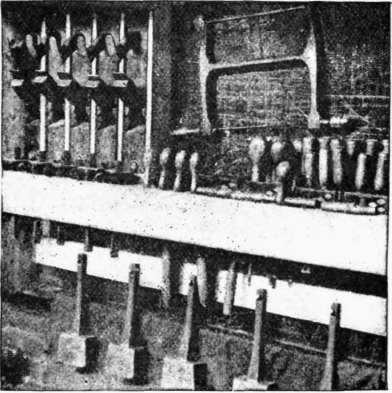
Fig. 298.
The other rack, e, in fig. 292 is also made by inserting bars of iron in the wall, but in this case the small batten timber which it is to contain stands upright. One row of bars only is necessary, at about 7 feet from the ground.
Gallery
This is provided with desks for drawing. This gallery is very useful when a demonstration is to be given. Simple desks only are required.
The artificial lighting of the shop can be obtained from a few four-light pendant burners, and some elbow bracket-lights on the walls, as shown in figs. 292 and 293. The centre lights should be about 7 feet from the ground, and the bracket lights about 6 ft. 6 ins.
Glue-Pot Tray
This is about 18 ins. by 9 ins., with a 6-in. guard all round. It is made of sheet iron, and should be placed in a corner of the room, and fitted with a Bunsen's burner for heating the glue. This fitting is much safer than a fire.

Fig. 299.
The heating of the room can be best obtained from a couple of slow-combustion 'Tortoise' stoves. These, standing out in the room, give plenty of heat, and do not consume much fuel. They have also the important quality of safety.
If an open fire is used, a high guard should be placed in front to prevent shavings being accidentally ignited.
Various other movable fittings will be required. Two strong sawing stools, like that shown in fig. 299, will be wanted.
Each boy should have a bench hook. This appliance is not exactly a tool, and has been regarded more as an appurtenanoe.

Fig. 300.
The bench hooks may be made by the teacher, or even by the boys themselves. The bench hook should be about 1 ft. long, 6 ins. wide, 3/4 in. thick, and a square piece of similar wood should be screwed on opposite sides at each end, as shown in fig. 300, allowing a clear space for sawing along one side of each stop. The bench hook is intended to allow the operator to saw completely through a piece of wood without damaging his bench.

Side elevation.

End elevation.

Plan..
Fig. 301.
The shooting boards, of which five or six should be provided, can also be made in the class. Fig. 301 is a dimensioned sketch; the length is omitted, as it may be anything from 2 ft. 6 ins. to 3 ft. 6 ins. It consists of one stile, with three rails mortised into it, as shown, and projecting far enough to carry another wider piece of wood screwed on the top. In the plan a little space is visible between the two pieces of wood, to allow the shavings to fall through.

Side elevation.

End.

Plan.
Fig. 302.
A key of some hard wood is inserted across one end. The inner side of this key should be at right angles to the side of the board, and the other side somewhat sloping. The use of this board is described in the exercises, but the importance of accuracy in making it may be emphasised here.
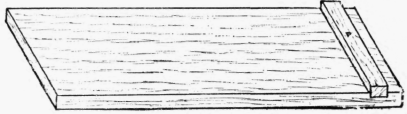
Fig. 303.
Fig. 302 shows a simpler shooting board, of a kind easier to adjust when necessary. The rails are screwed on to two boards of different thickness, in this case.
The Panel board, fig. 303, is a flat piece of board, generally made of Weymouth pine, 1 in. or more thick, 11 ins. to 2 ft wide, and 2 ft. 6 ins. long. A piece of wood is grooved in across one end. This board is used to obtain a good true surface to plane the wood on when the top of the bench is worn, and to temporarily nail down light work on, such as parquetry, in order to save the top of the bench.
Continue to:


My Books

